
Getting Started
Lets start by creating an account here. Already have an account? Login here.
Sign up
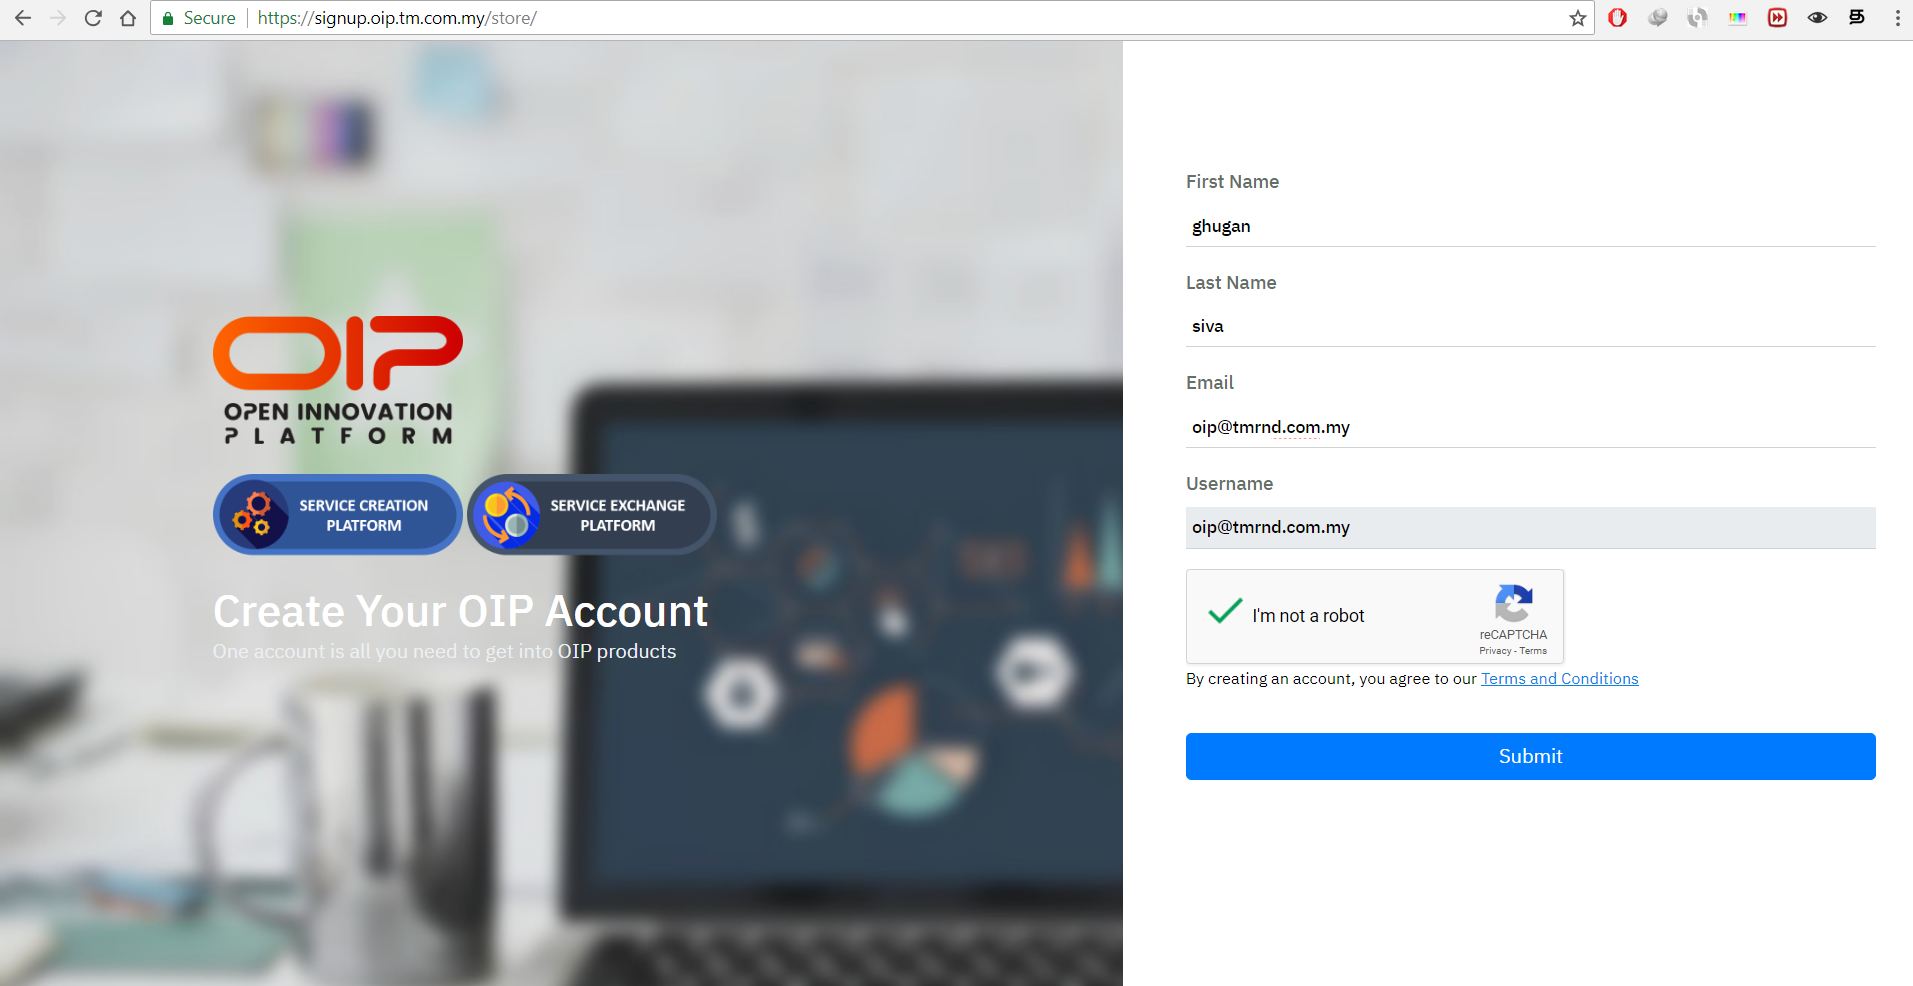
1. Please enter your first name, last name followed by your email and check the "I am not robot" box before clicking the submit button.
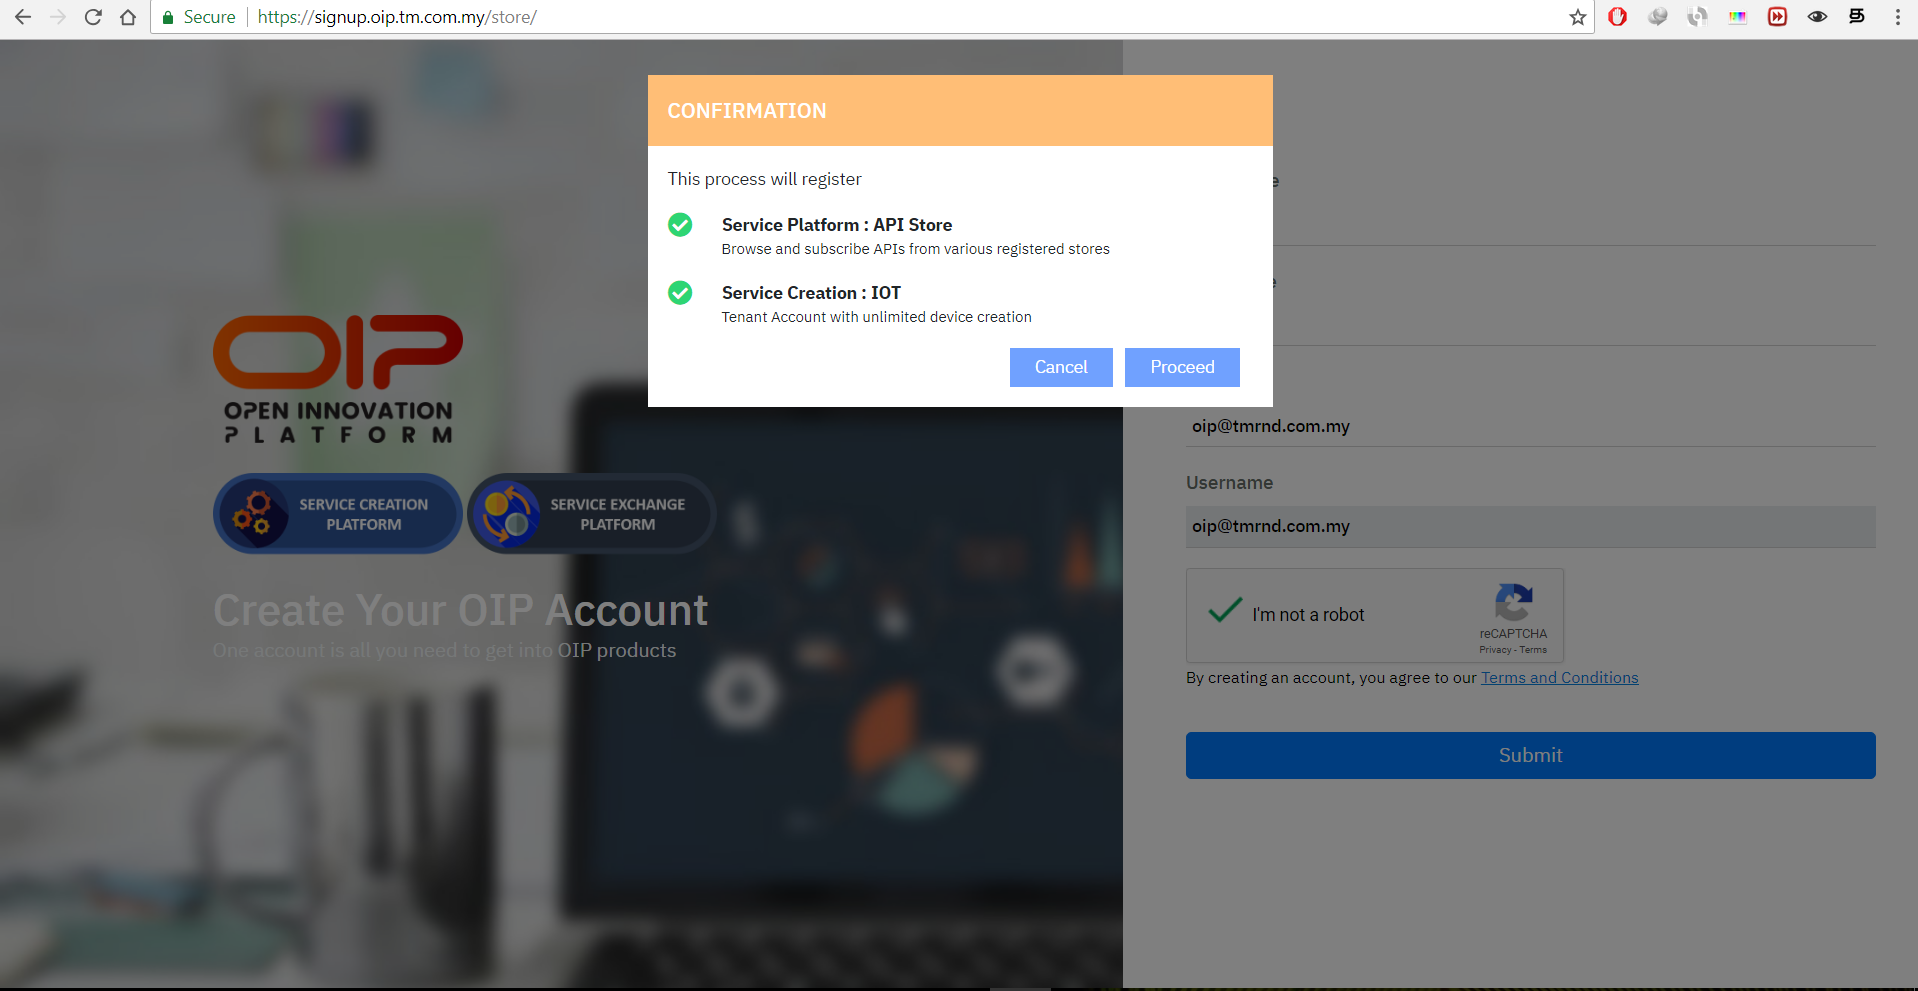
2. You should see GREEN checked icon for both of the service account creation. Now click on the
proceed button.
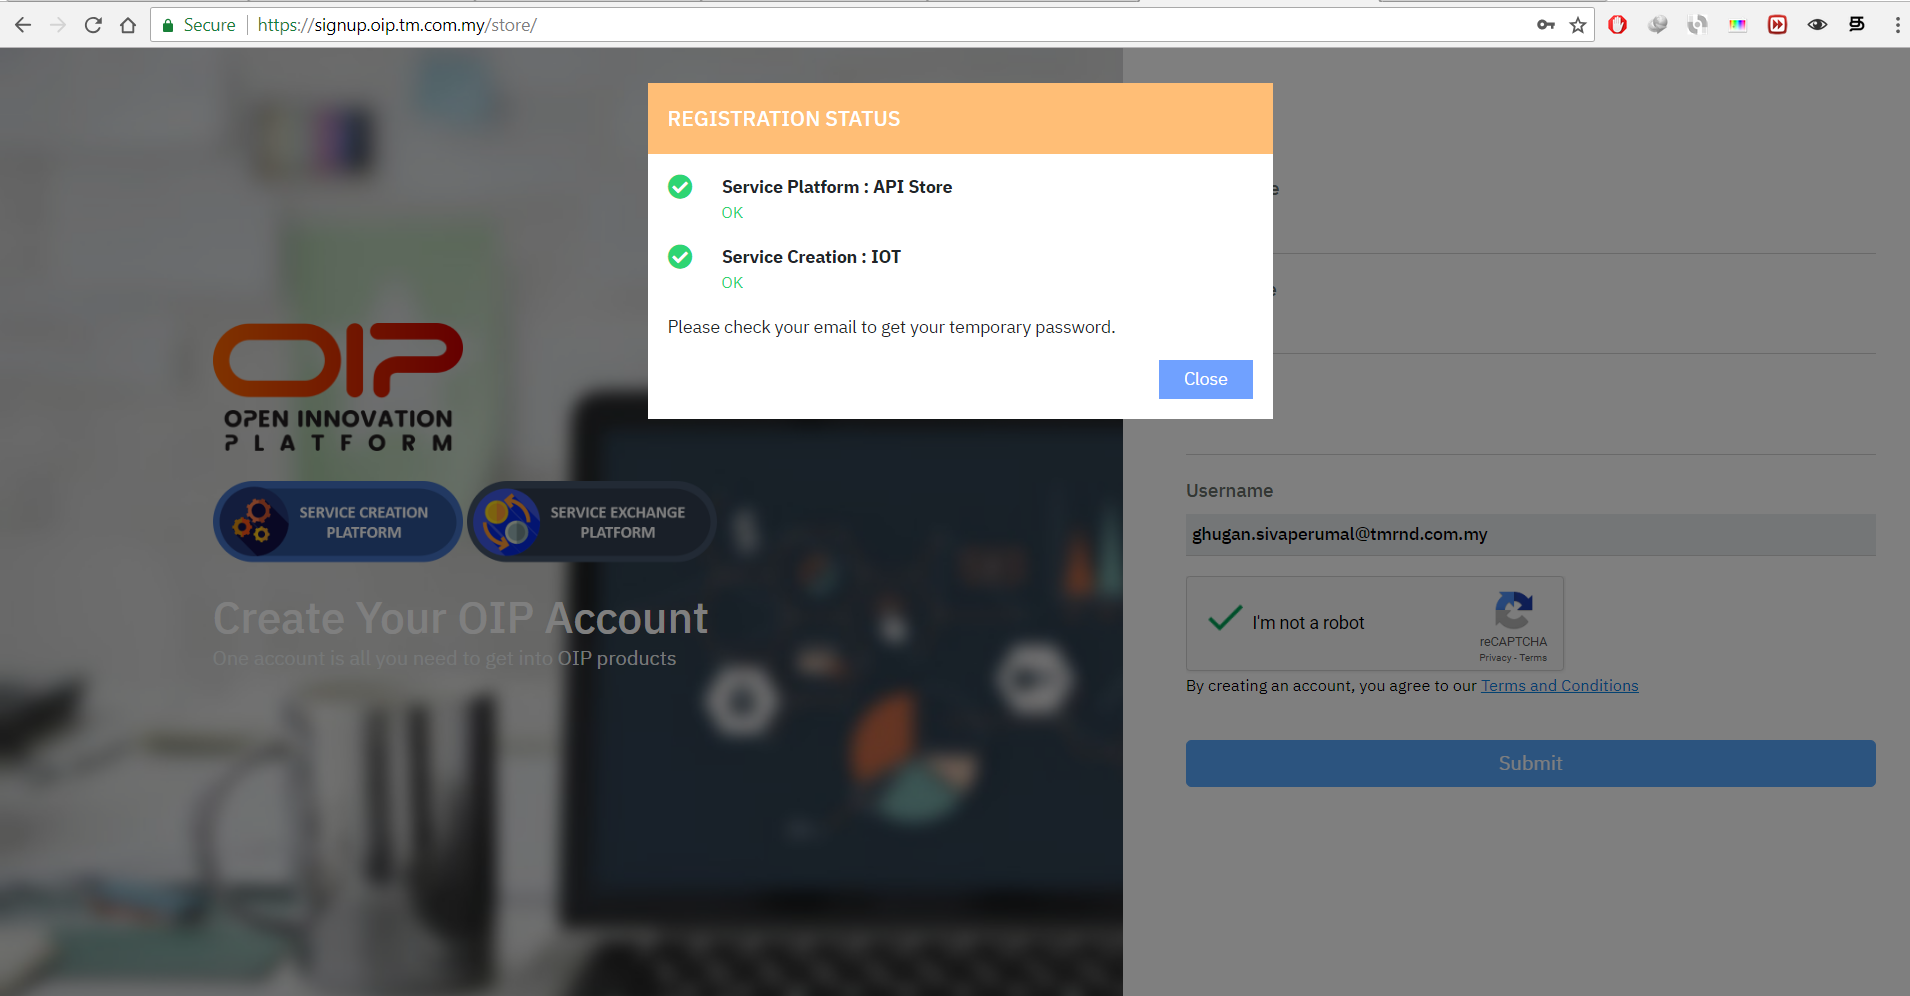
3. You should get
status ok for both of the service account creation. Click on close and check your email to get the temporary password.
Login
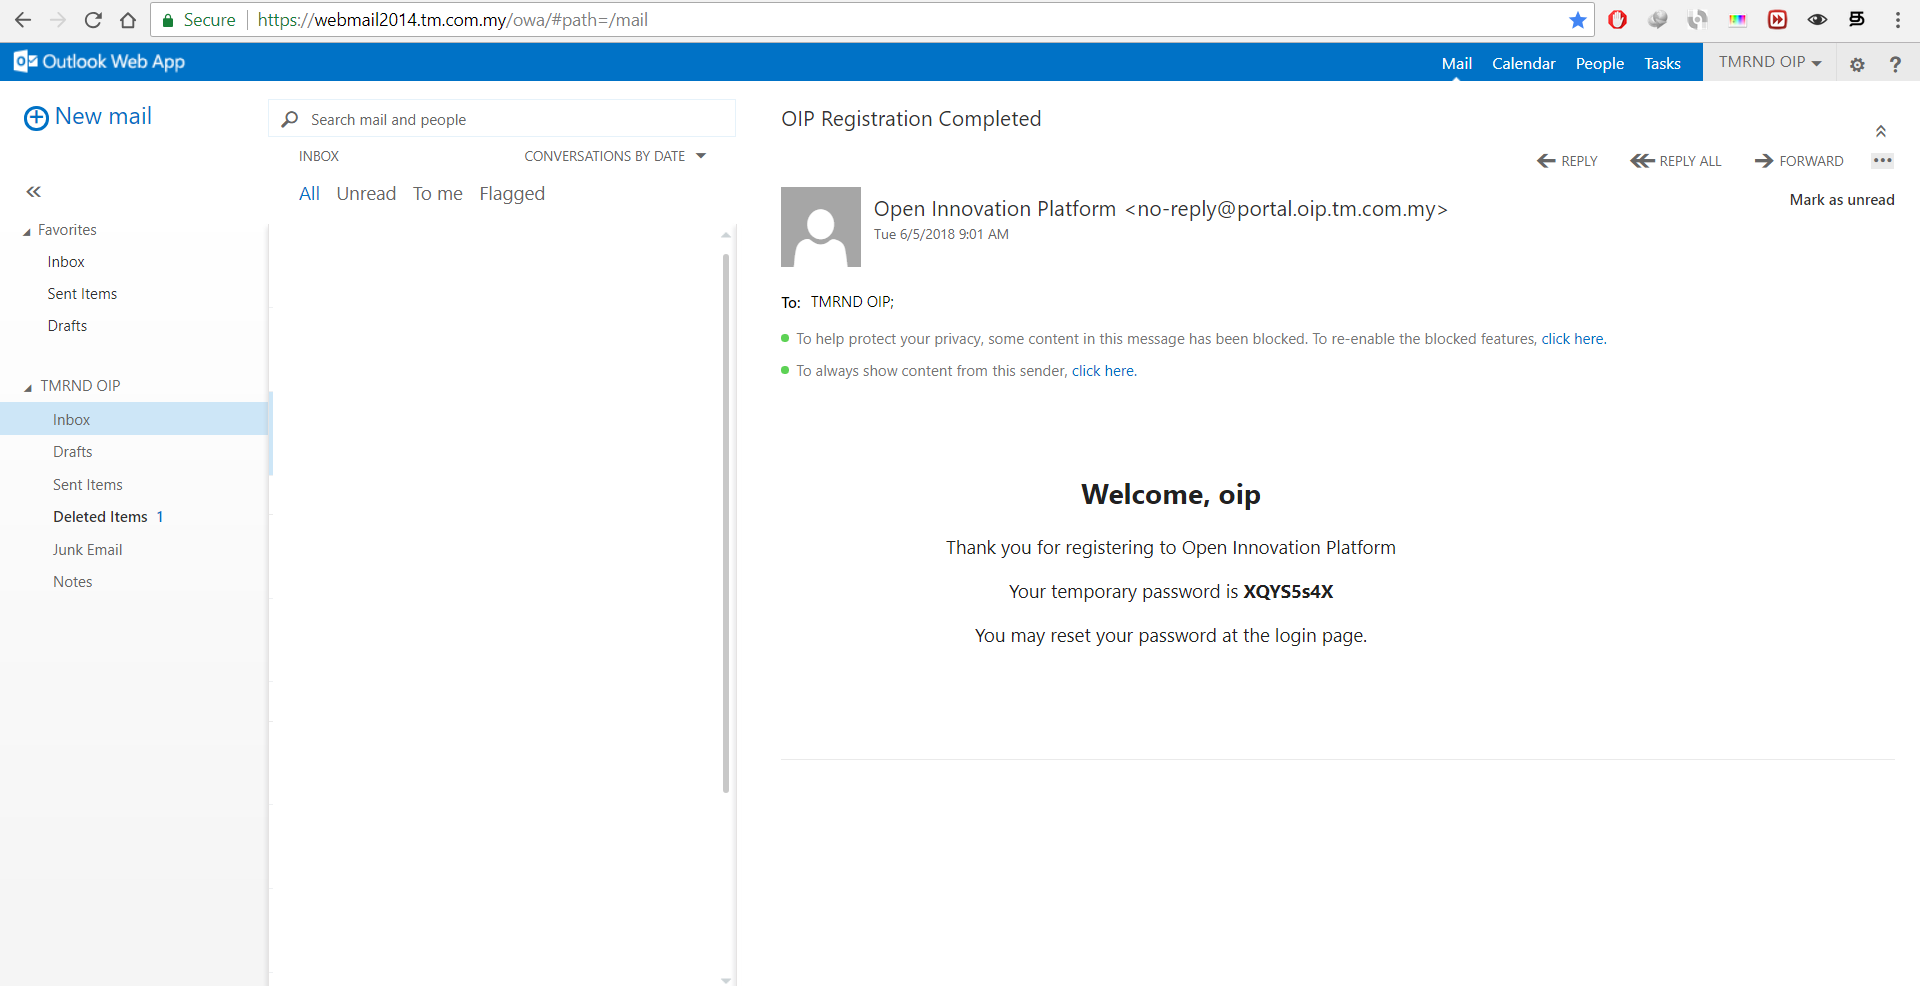
1. Check your email to get the temporary password. Copy the password to clipboard.
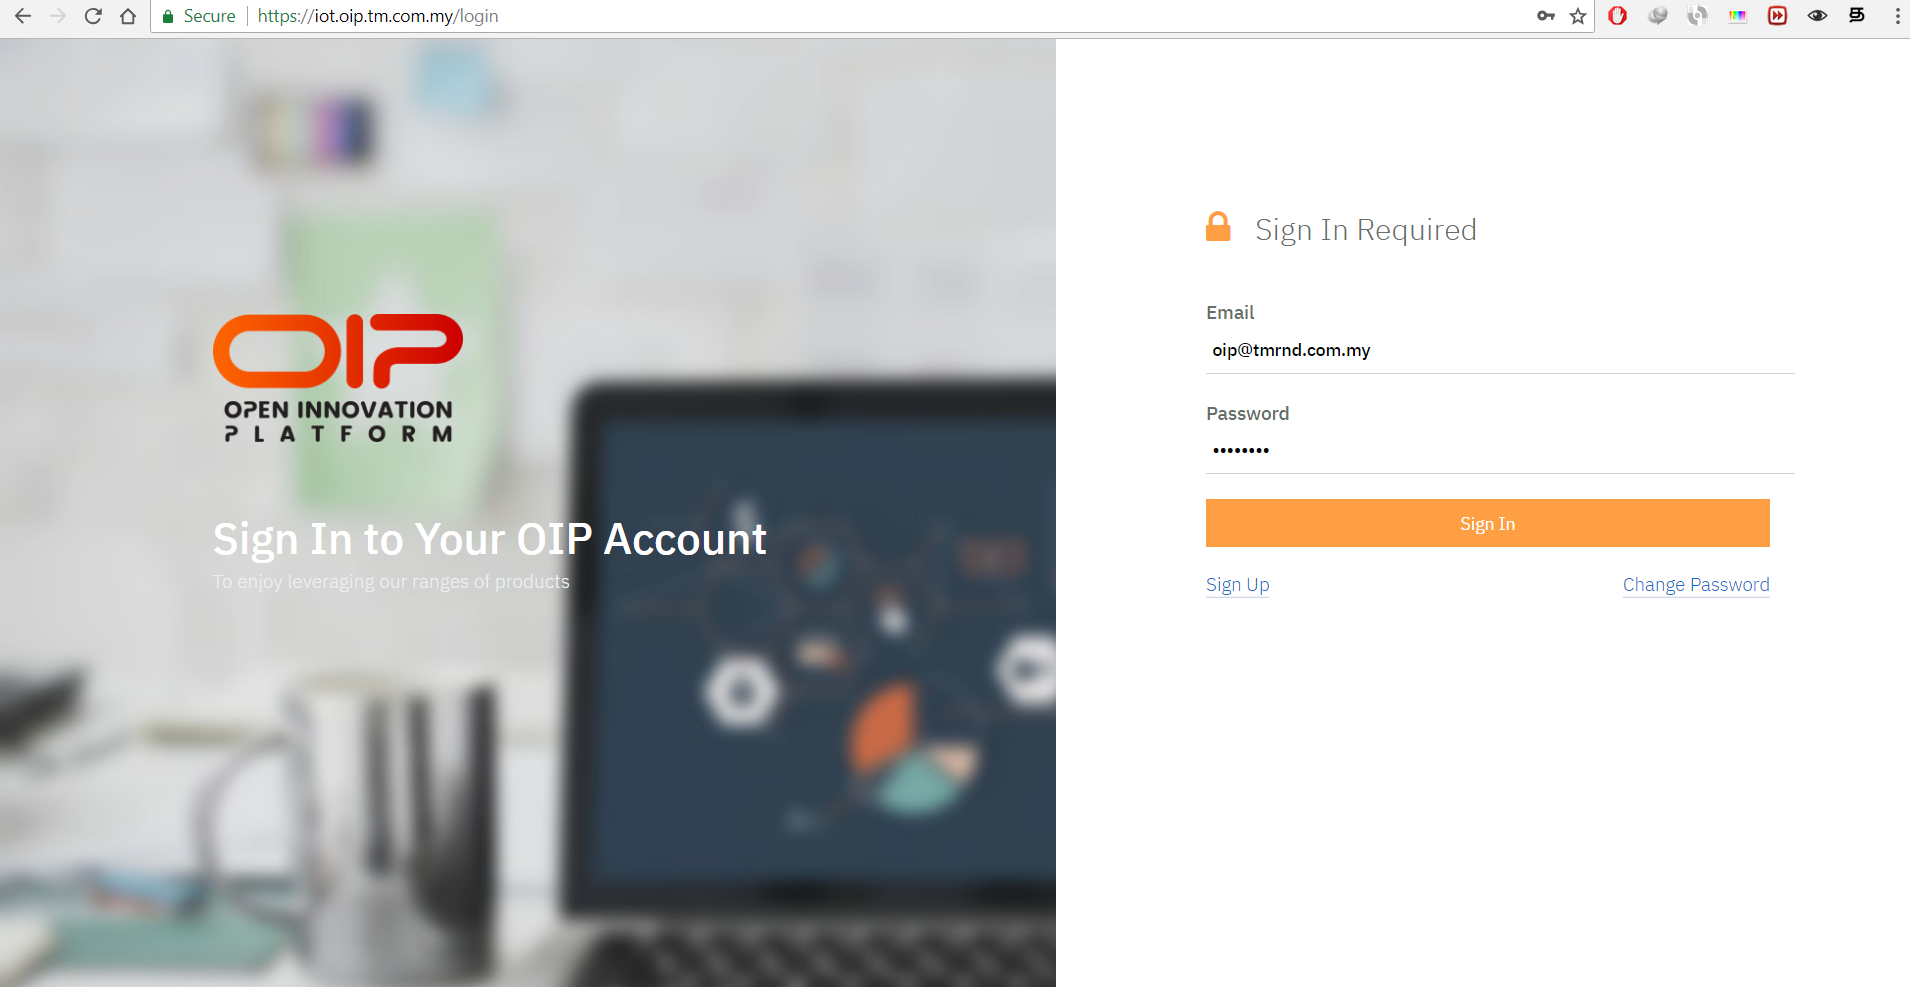
2. Now go to login
page and enter your email and the temporary password . To change the temporary password click on change password.
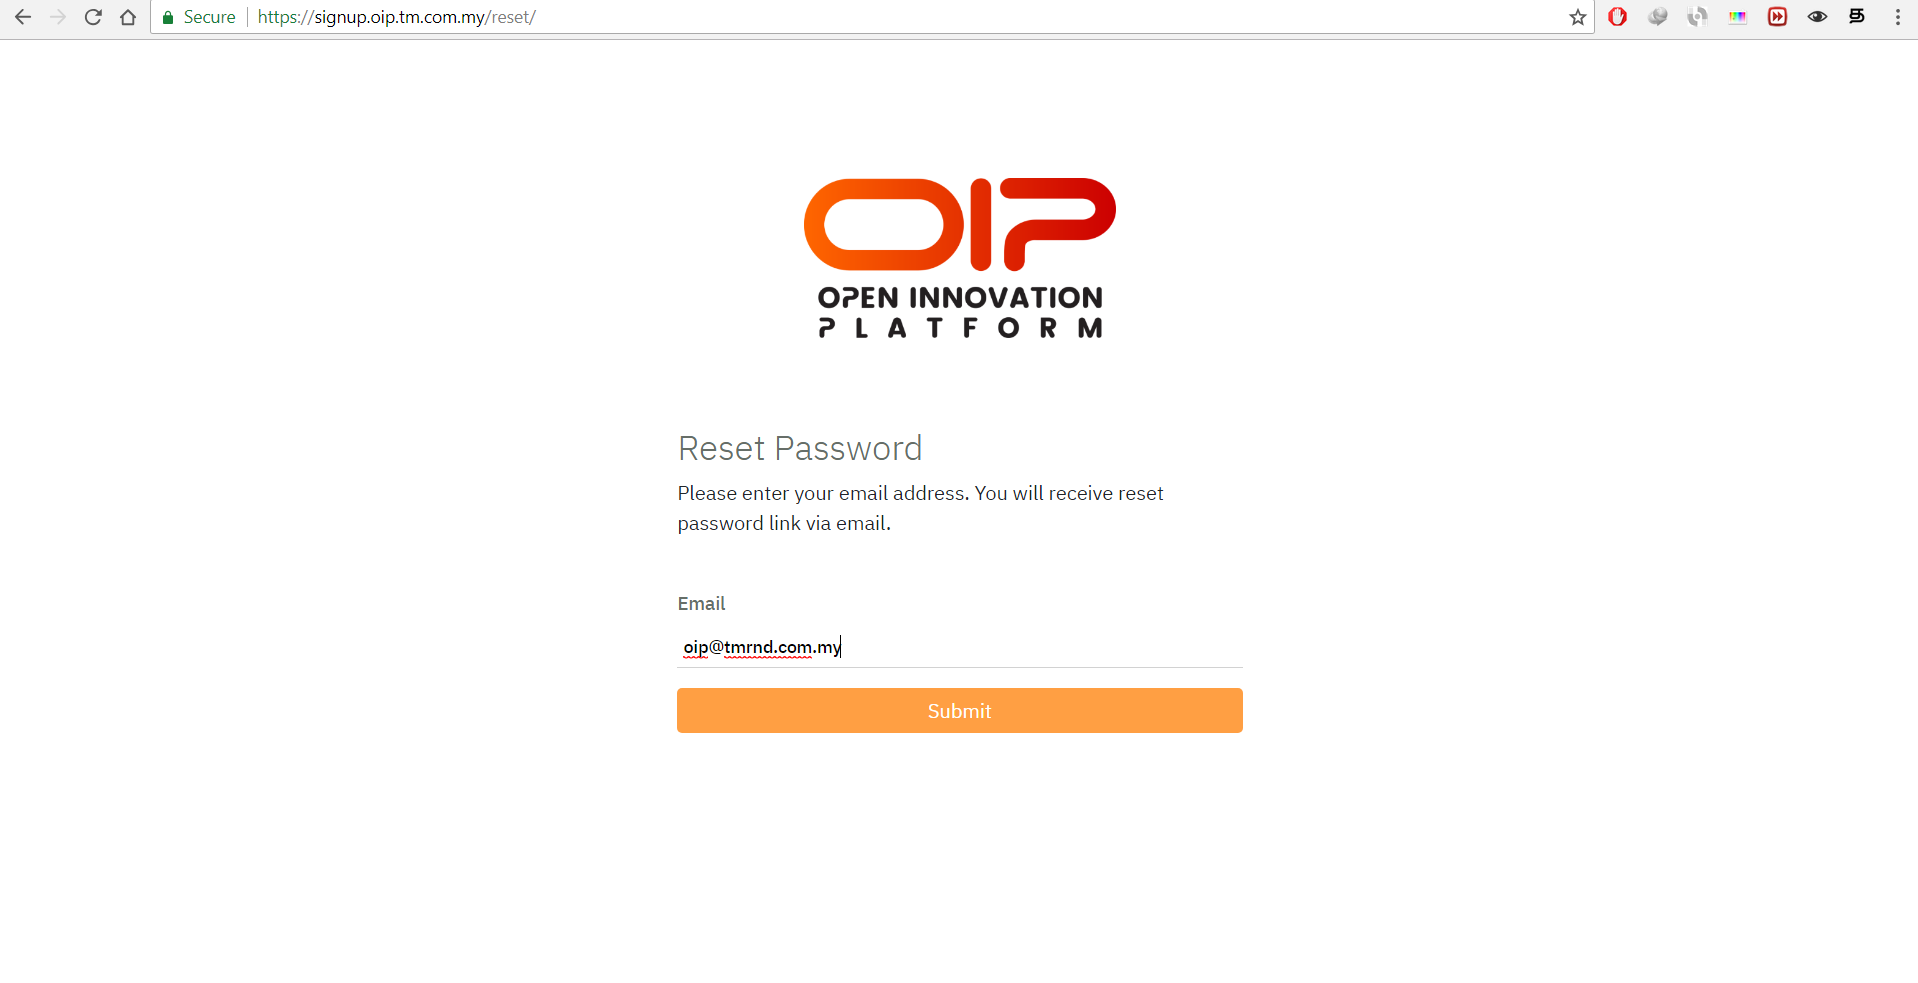
3. Please enter your email to receive the link to reset your password.
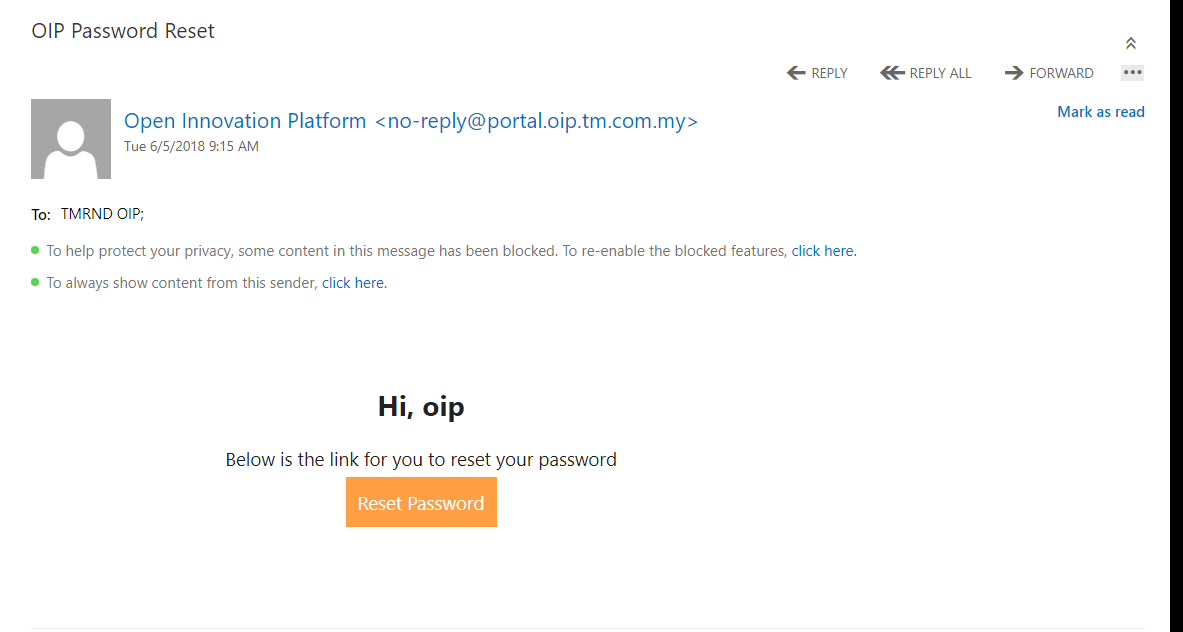
4. Check your email for the reset password link.

5. Click on the Reset Password button in the reset password link to change your temporary password.
6. Please enter your new password and click on submit button.

Service Creation Platform
Service Creation Platform helps you to create your own IoT service which can be published to the Service Exchange Platform for others to subscribe. In order to provide the data to others, your device(s) should start sending the data to the Service Creation platform. A device can individually sends data to the Service Creation platform or through a gateway. There are two ways of sending data to the Service Creation platform, which is via MQTT or HTTPS protocol.
Configure Device
Lets try to configure to send temperature and humidity data to the Service Creation platform in JSON format. You need to create a virtual device to represent your physical device.
Data to send in JSON format. Copy the following and save as data.json.
[
  {
    temp: 70,
    humidity: 65
  }
]
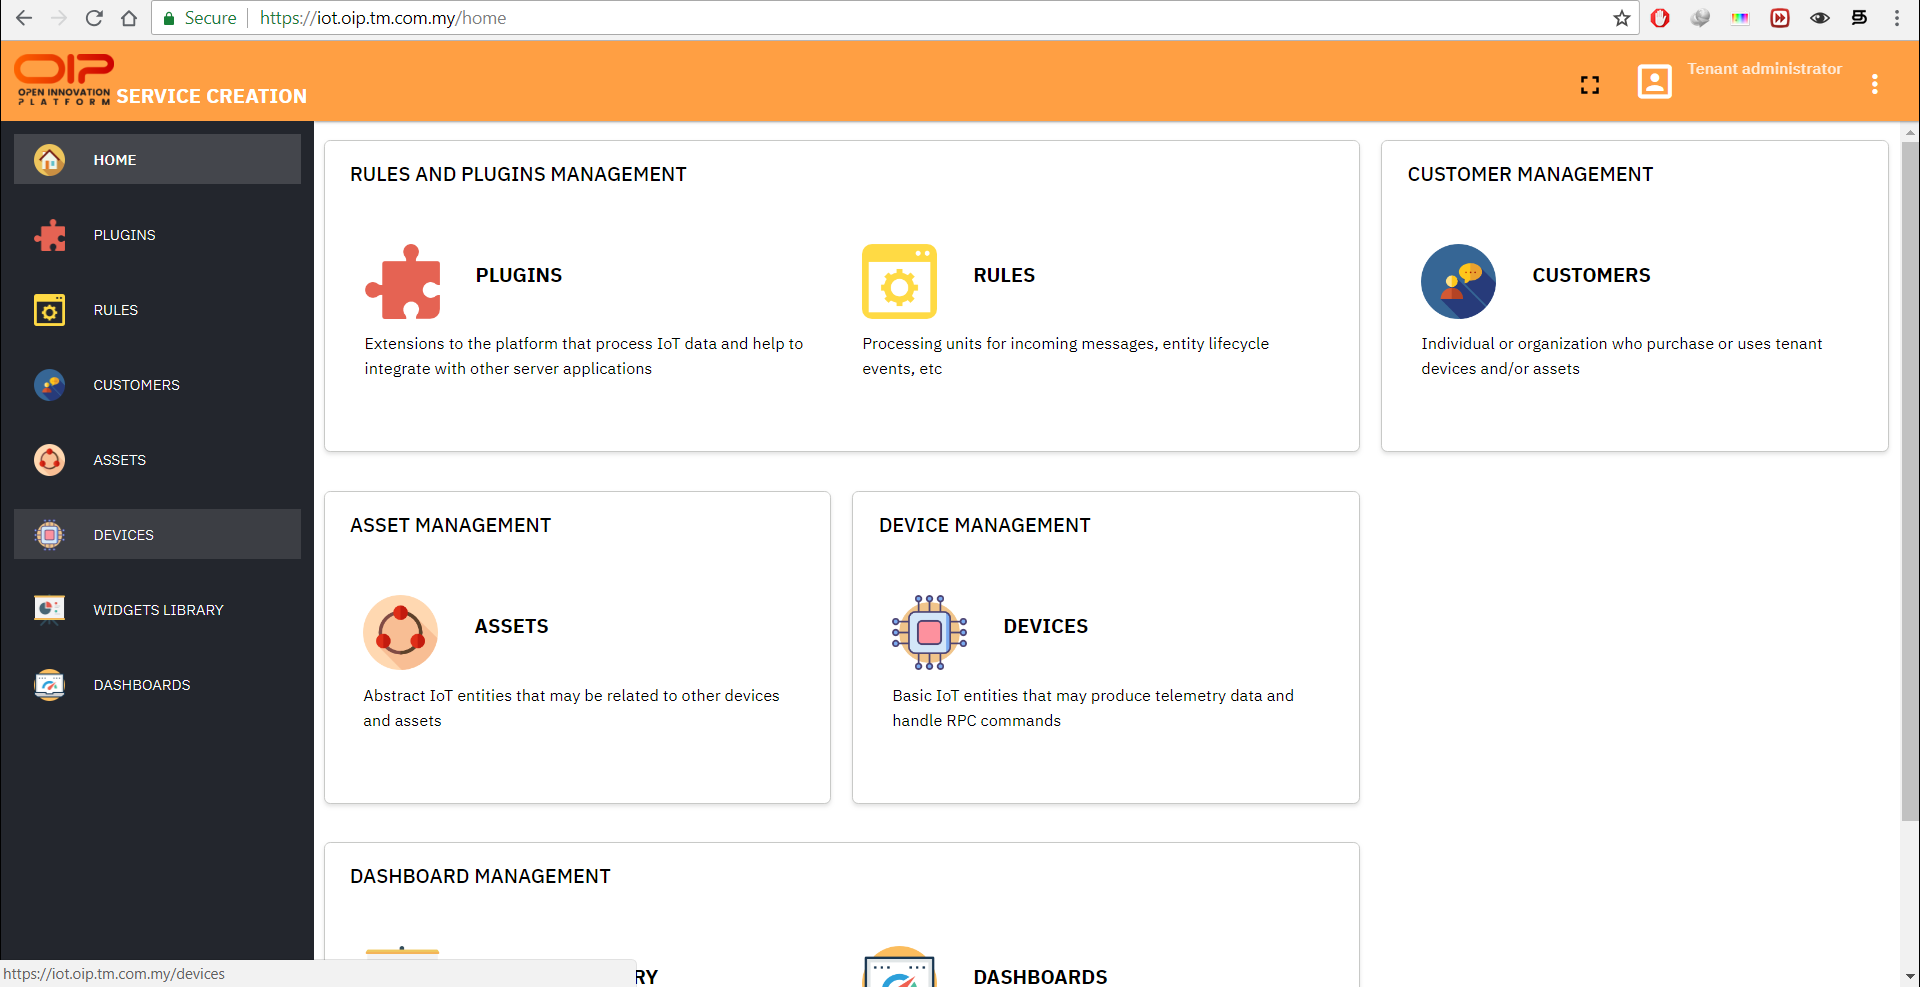
1. First click on device button to go to device panel.
2. Select any device that you want to make as your virtual device to be able to keep your data.
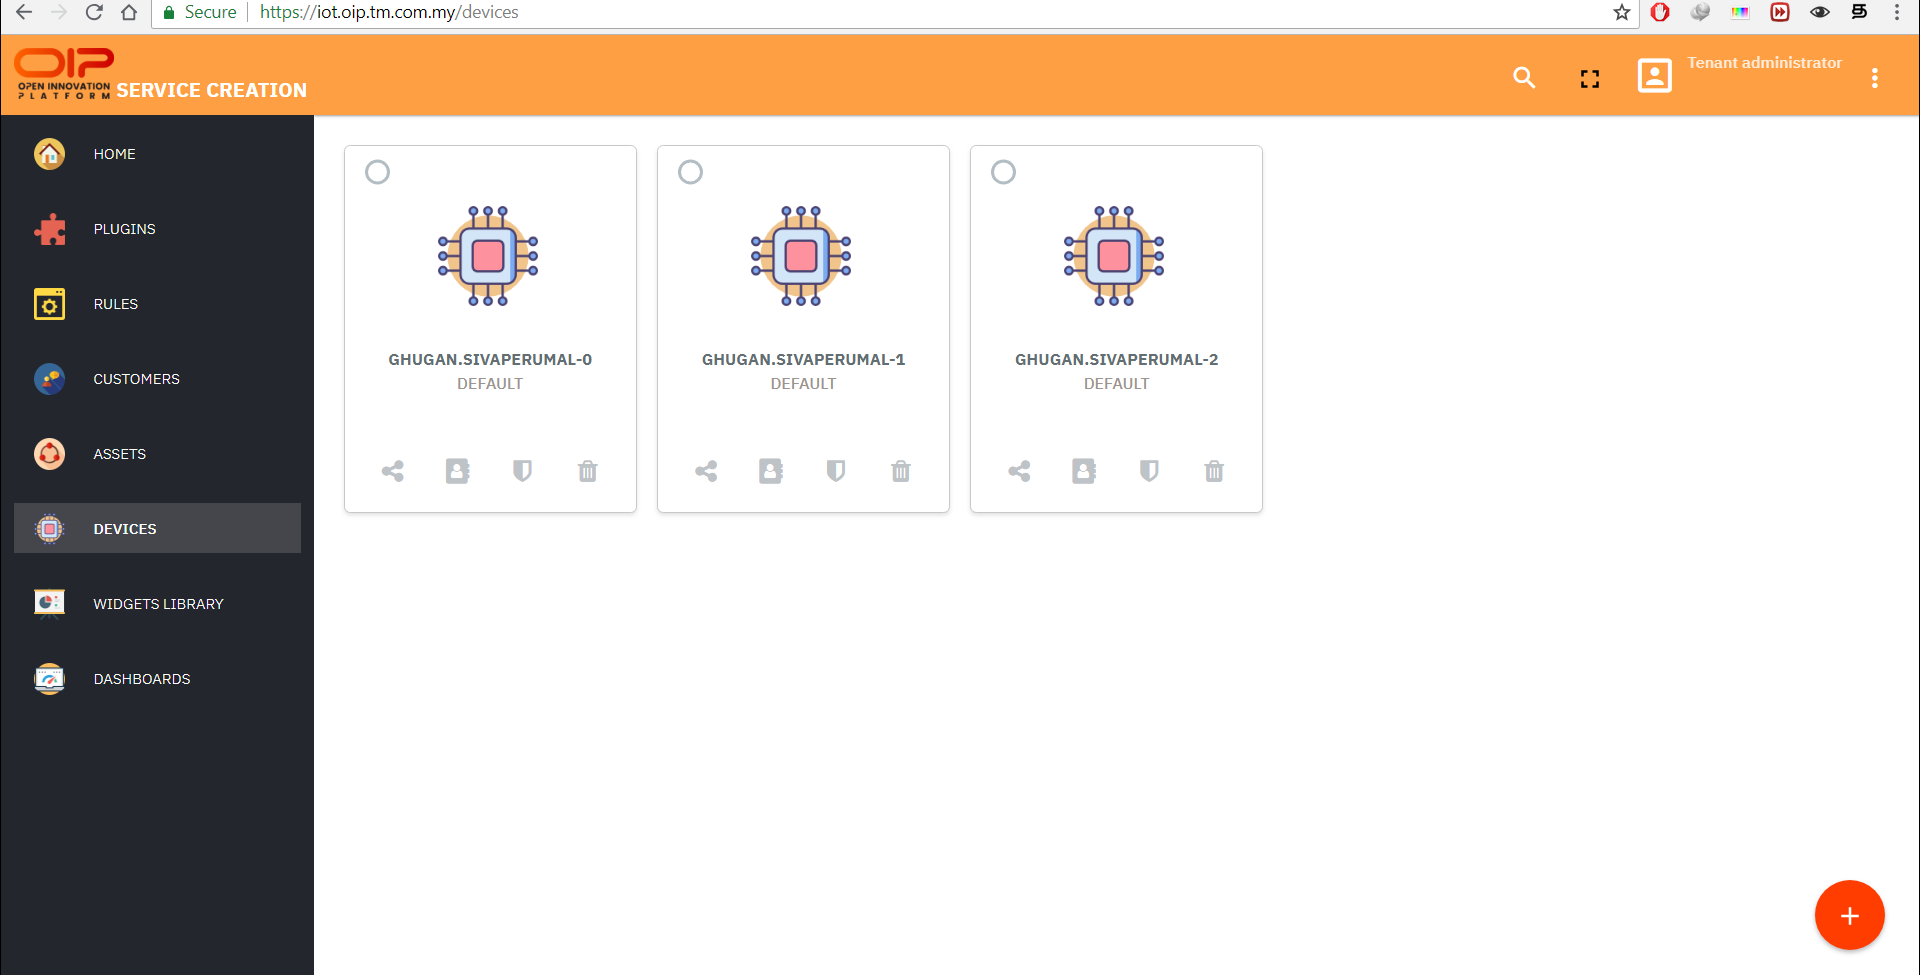
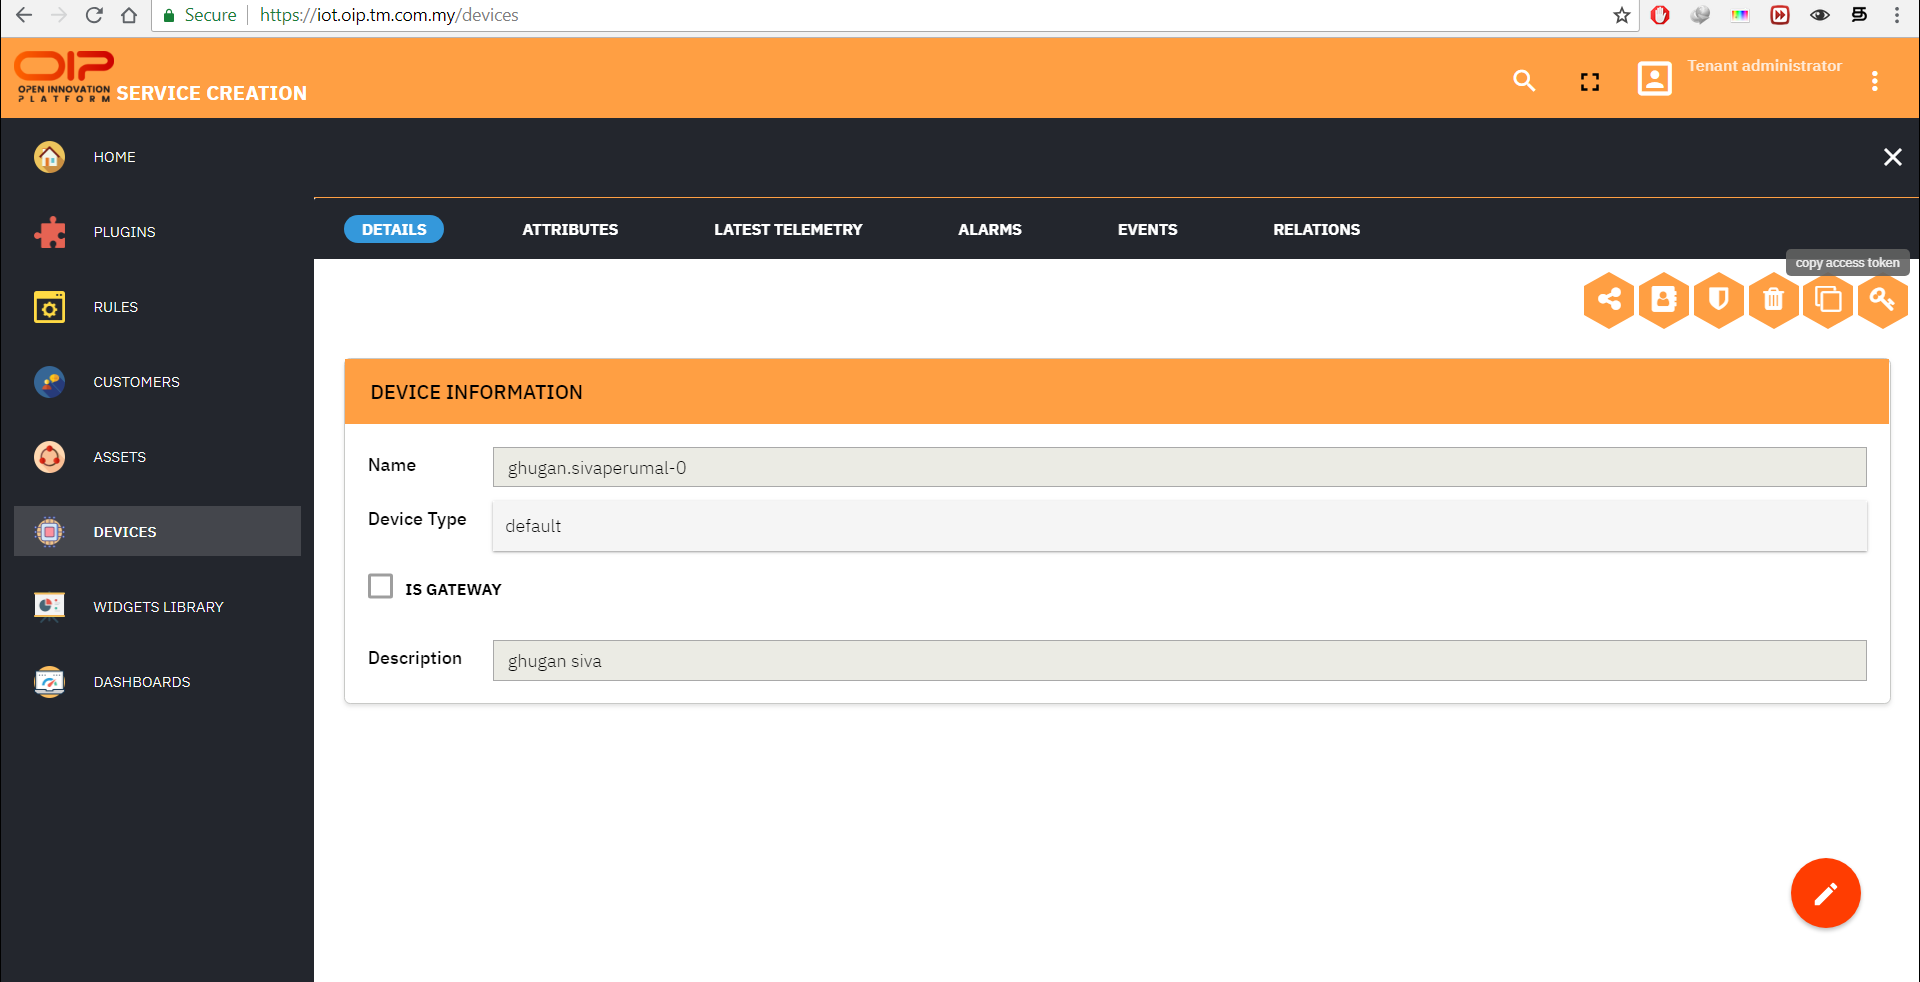
3. Copy the access token to clipboard to identify the device.
Sending Data via MQTT
As an example, we are using Mosquitto as the MQTT client. You can use any MQTT client of your liking. With all the parameters that we have in the preparation section, run mosquitto_pub on the Windows command line.
# run the mosquitto publisher
mosquitto_pub -d -h "iot.oip.tm.com.my" -t "v1/devices/me/telemetry" -u "$ACCESS_TOKEN" -f "data.json"
Replace the $ACCESS_TOKEN with the device actual access token
From client point of view, a successful transmission should look like this:

Sending Data via HTTPS
Parameter wise, sending data via HTTPS is similar to MQTT. In this example, we are using Curl as the HTTP client. Simply run the cURL command on the command line.
curl -X POST \
  https://iot.oip.tm.com.my/api/v1/teiOoHIaVDAozEnikRaa/telemetry \
  -H 'Content-Type: application/json' \
  -d '[
  {
    "temp": 70,
    "humidity": 65
  }
]'
There are no HTTP response body provided by the Service Creation platform. Verification on client side can be done by simply checking the HTTP status code. A successful transmission should return status code 200.
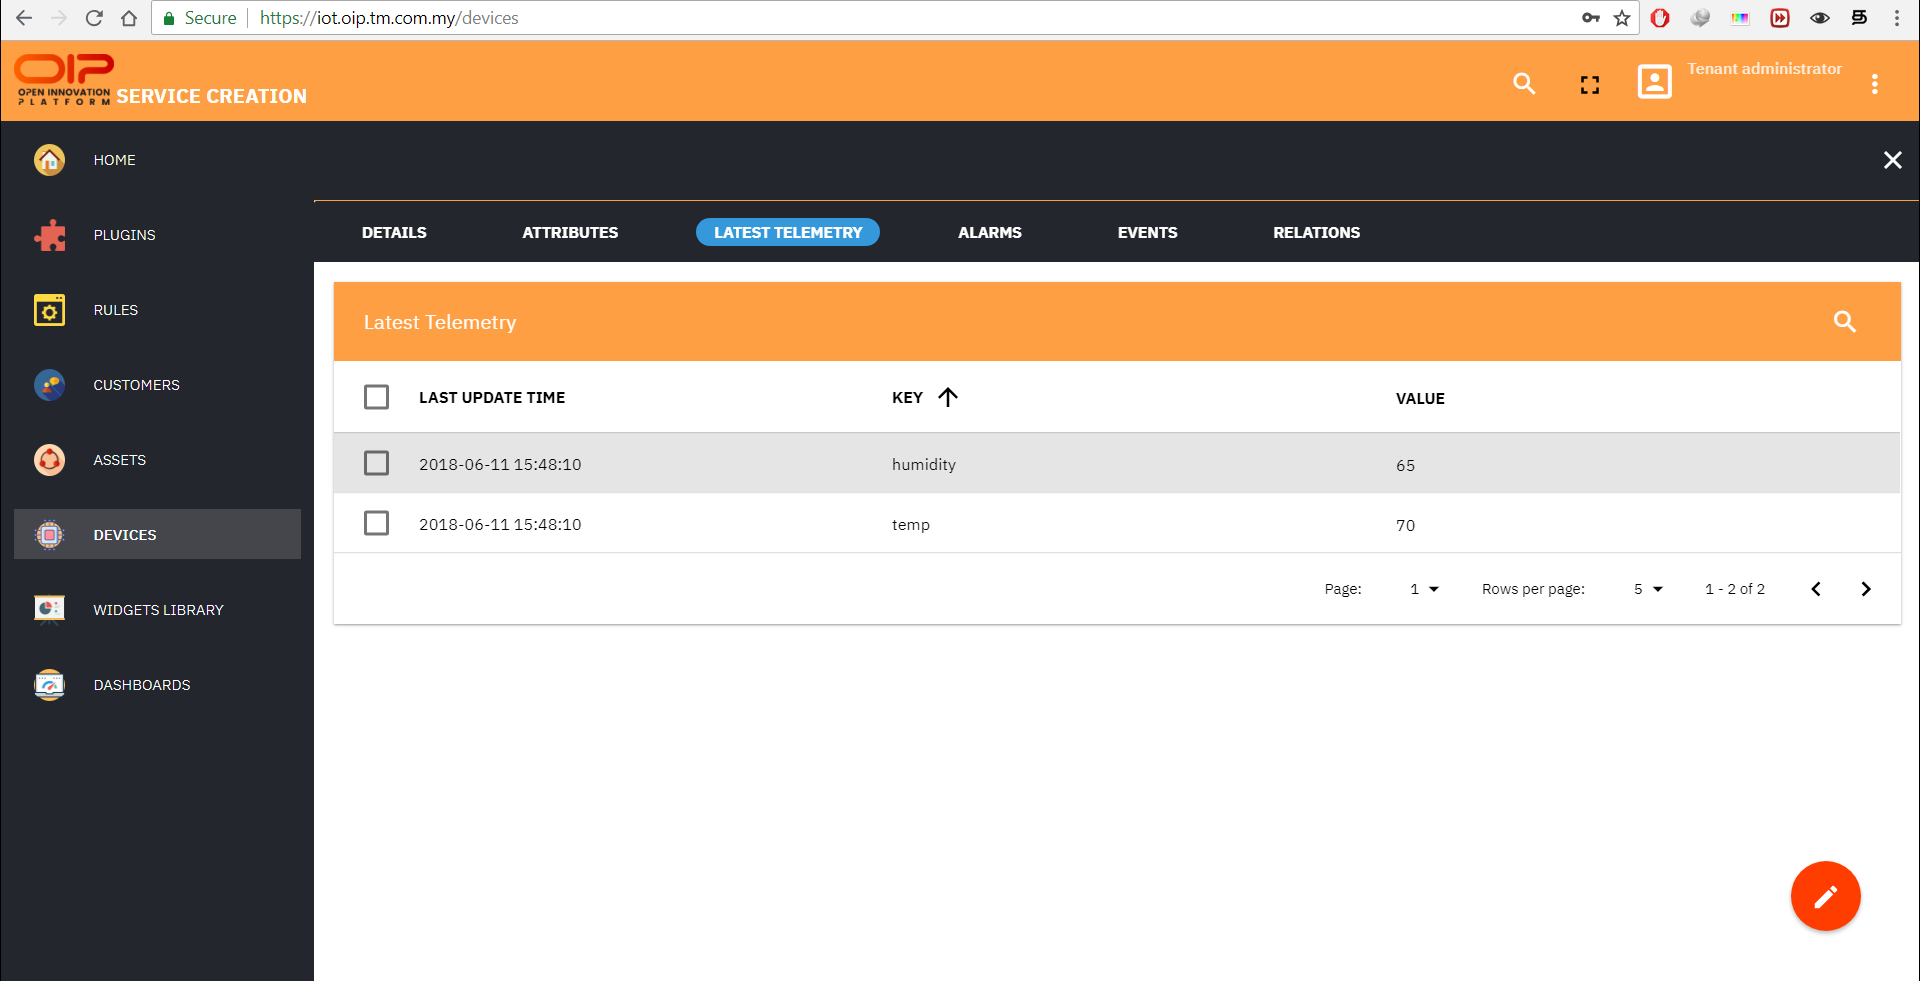
Receive the data
The simplest way to verify if the data has really successfully sent to the Service Creation platform is to check on the Service Creation platform console. Browse to the desired device detail and click on latest telemetry tabs. It should show the latest data that has been sent by the device.
What's Next
Please proceed to our Service Exchange Platform on how to interact with your IoT device. Go here
Dashboard
For free user, you are only given a customer role.

Whenever clicking the View Dashboard, you will find out that the dashboard view is blank for your devices and you are not allowed to add any dashboard for your devices. Please contact us for further arrangement.

Quick Start using Windows
Sending Data via MQTTBox
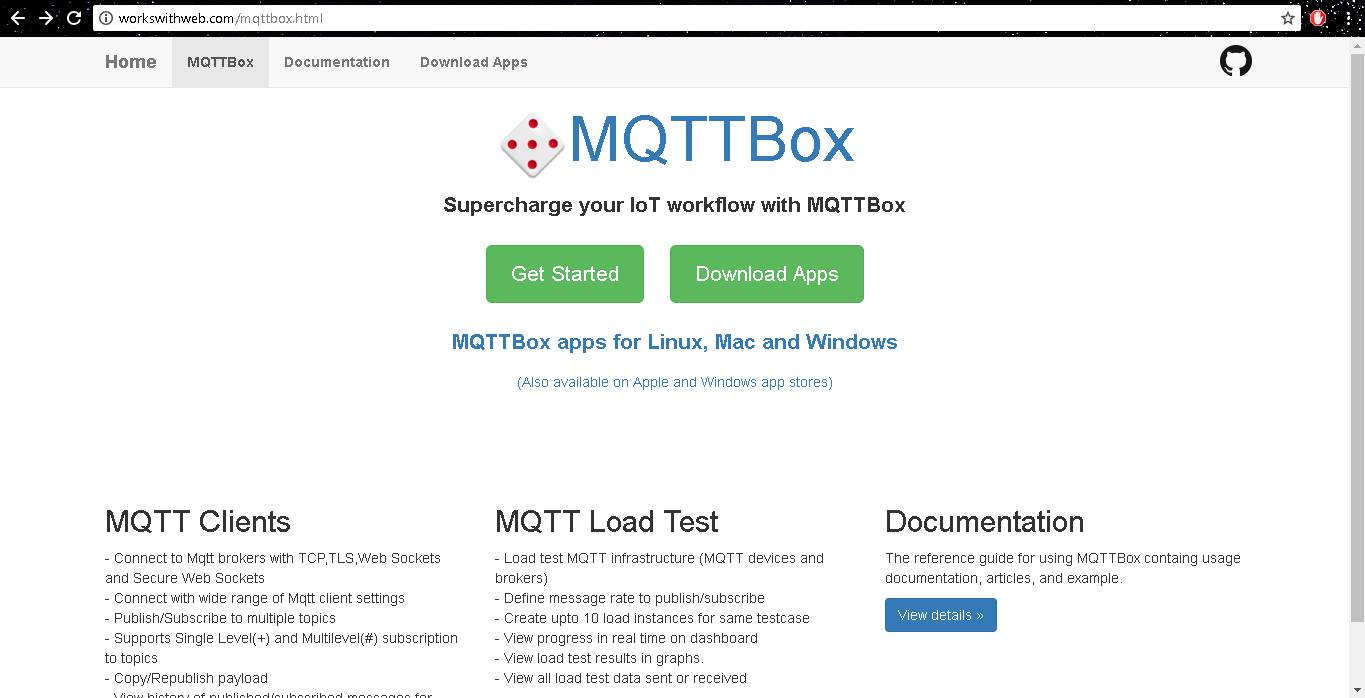
1. Download and install MQTTBox. Download here
2. Run MQTTBox application and click on the Create MQTT Client button.

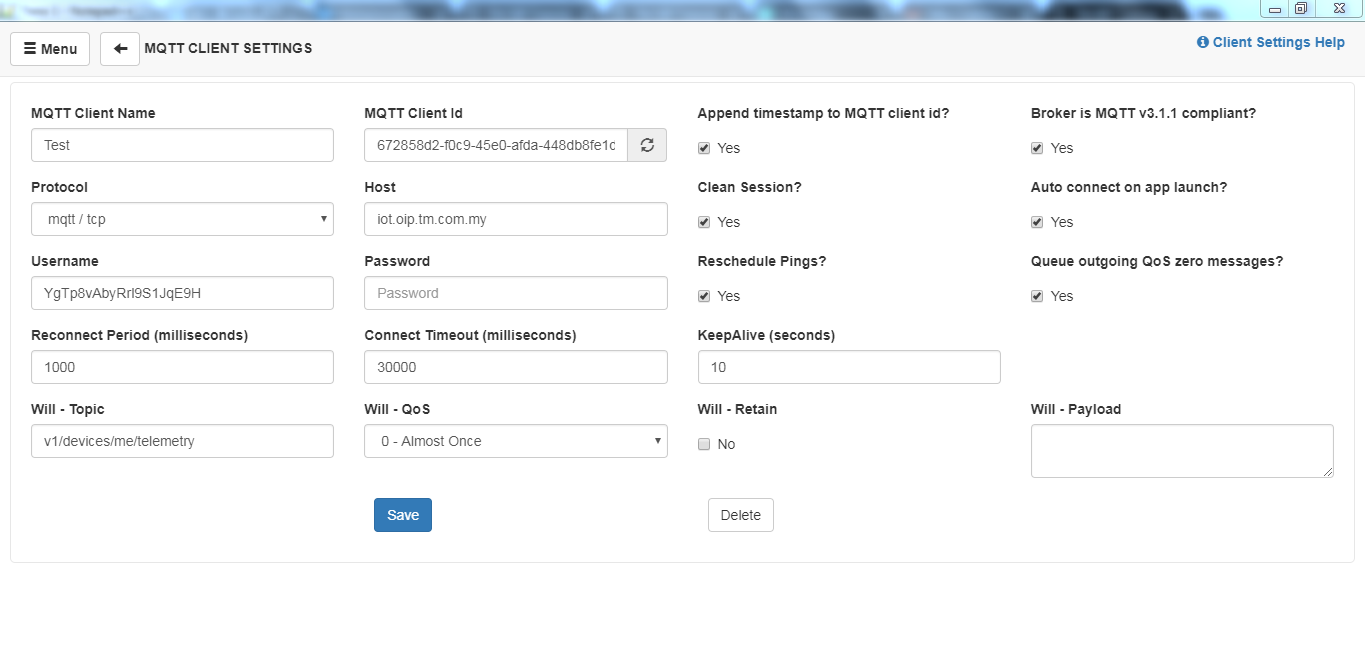
3. Enter the information required for setting in MQTTBox application and save the setting. For example,
| MQTT Client Name : | Any Name |
| Protocol : | mqtt/tcp |
| Host : | iot.oip.tm.com.my |
| Username : | $ACCESS_TOKEN |
| Will - Topic : | v1/devices/me/telemetry |
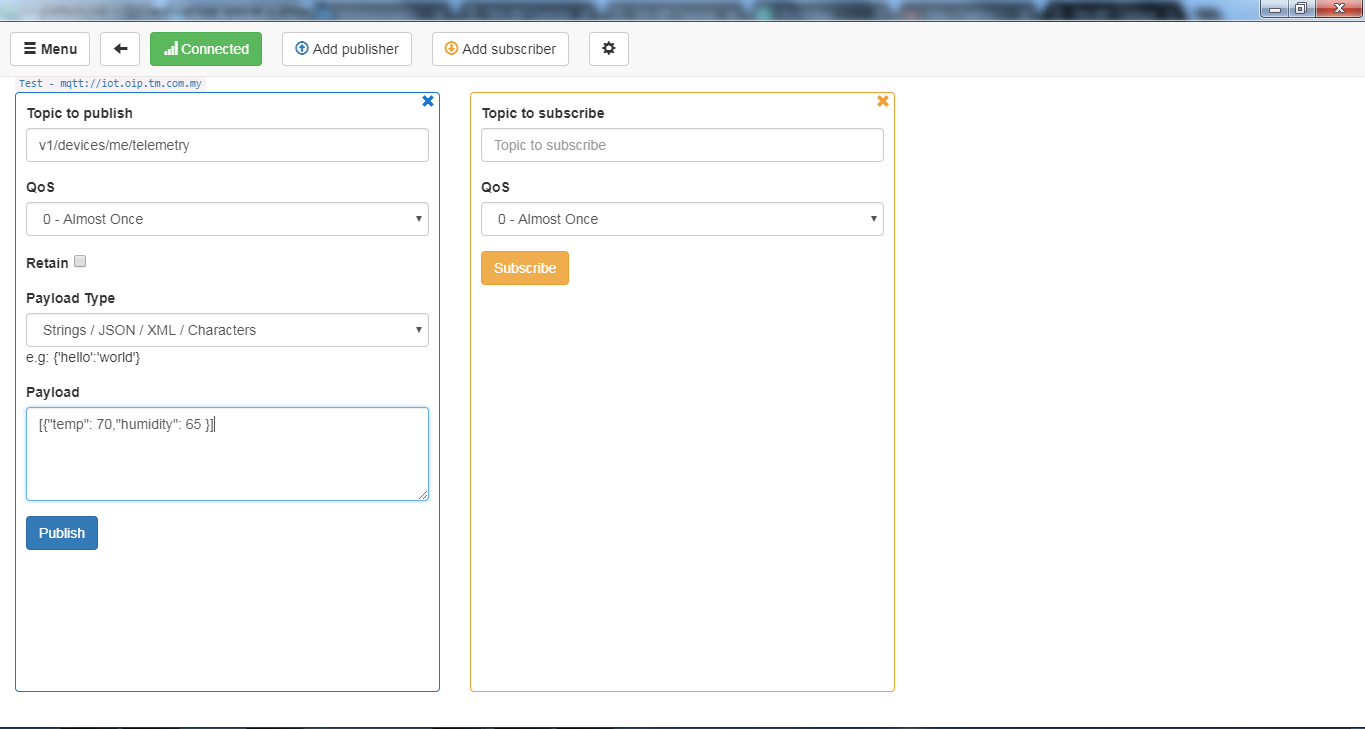
4. To publish payload, you need to provide Topic to publish which is same as Will - Topic and Payload in JSON format as example shown.
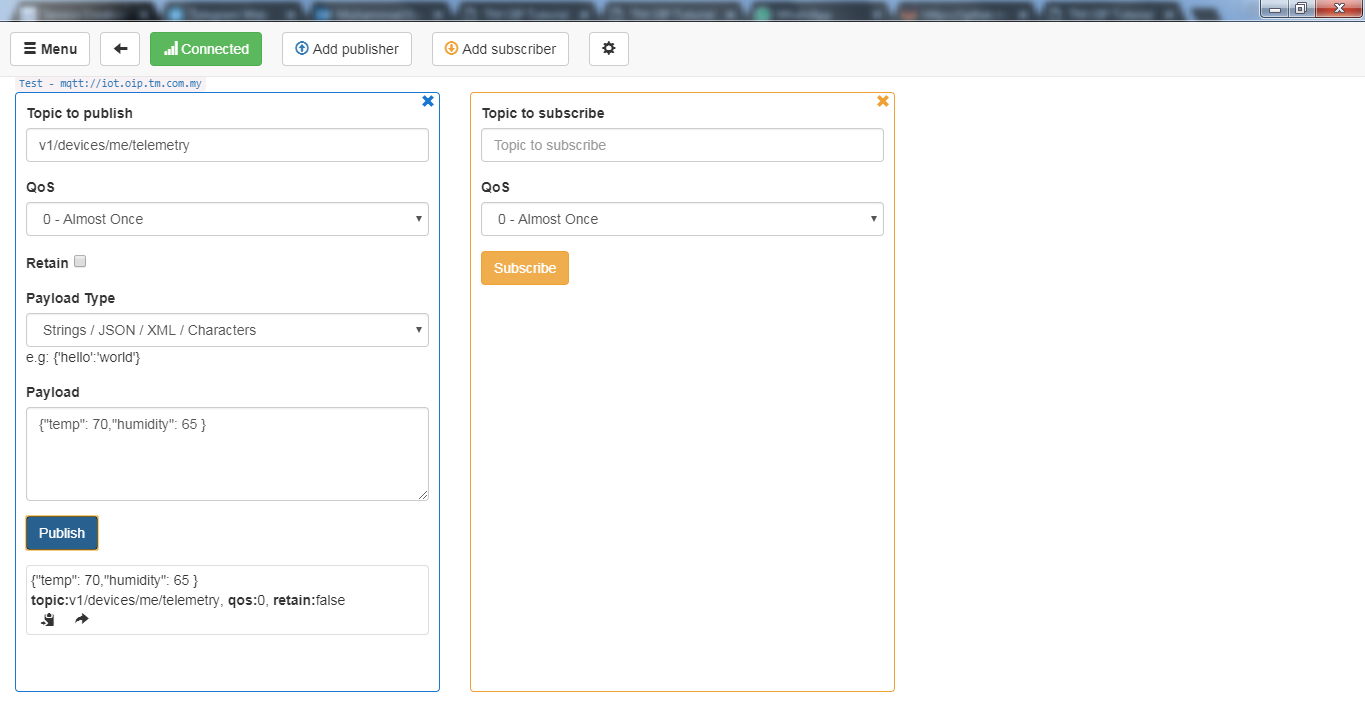
{
"temp": 70,
"humidity": 65
}
5. Click on Publish button and you will see details of data on below.
Sending Data via Postman
1. Download and install Postman. Download here
2. Run Postman application and change GET drop-down to POST.
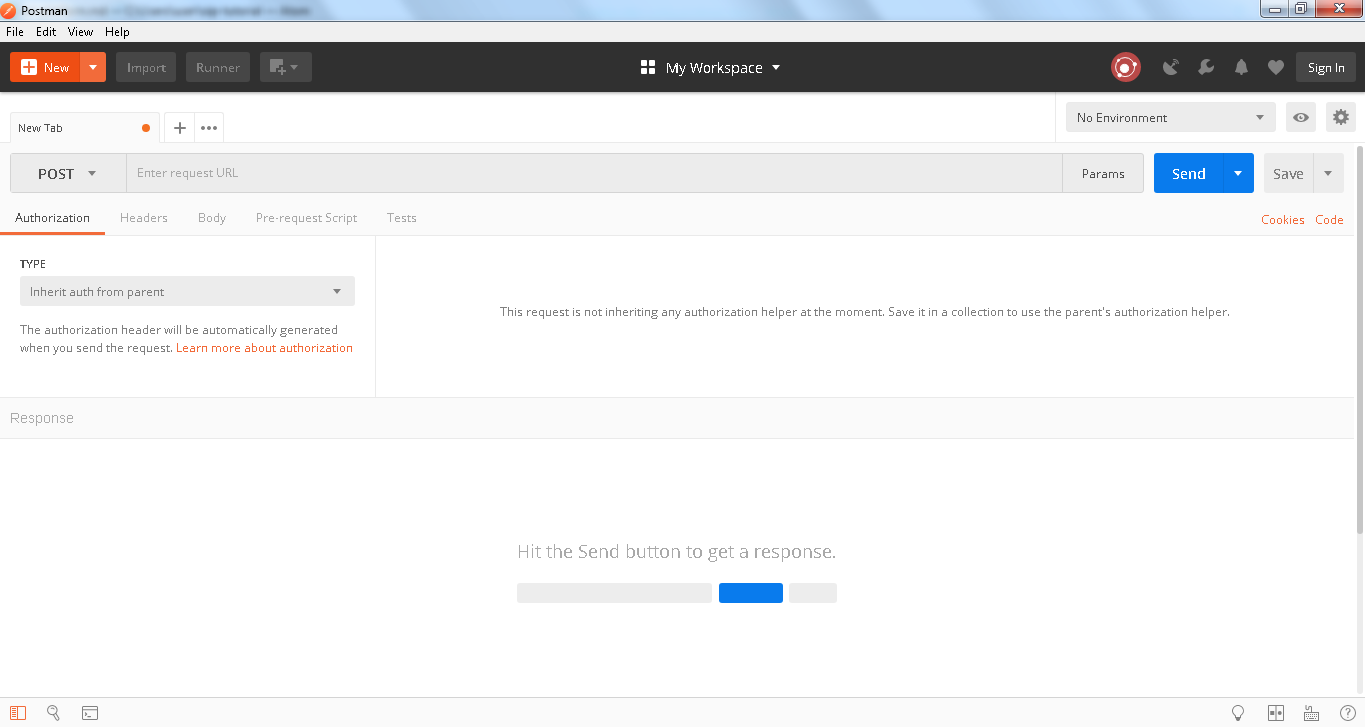
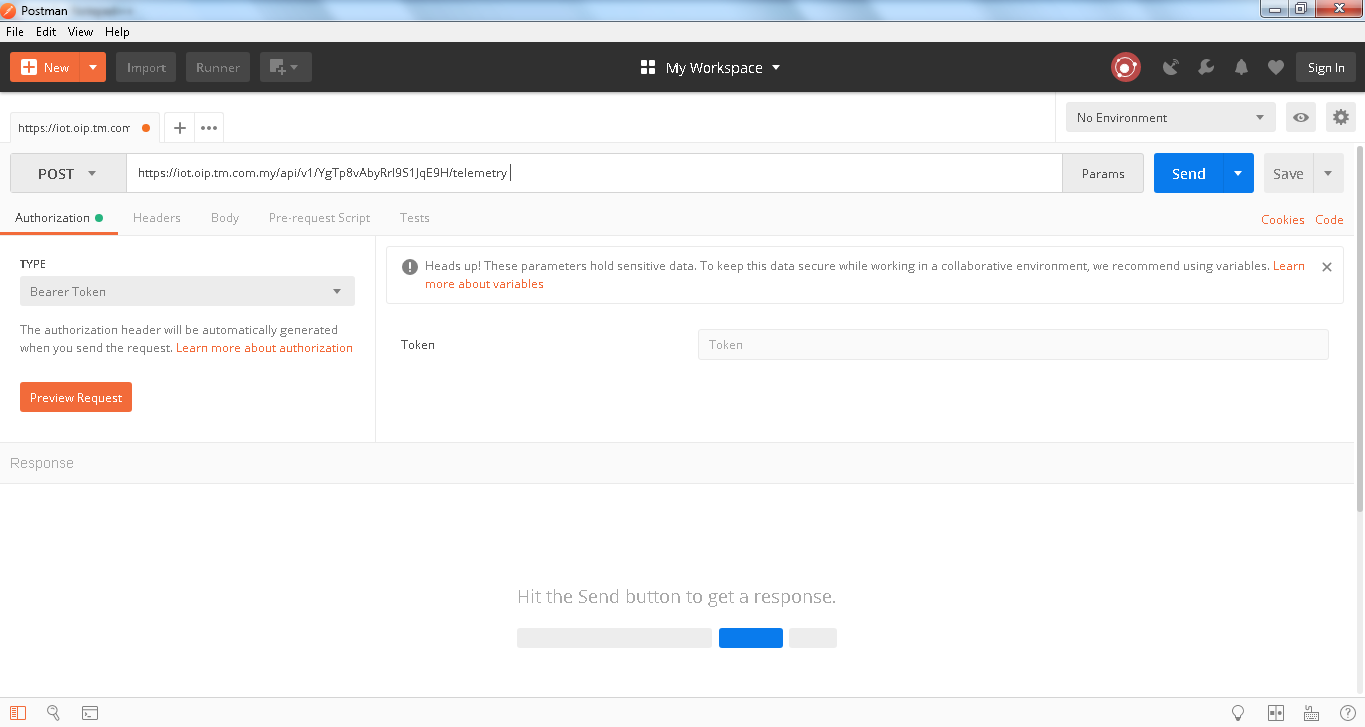
3. Enter the request URL as below.
https://iot.oip.tm.com.my/api/v1/$ACCESS_TOKEN/telemetry
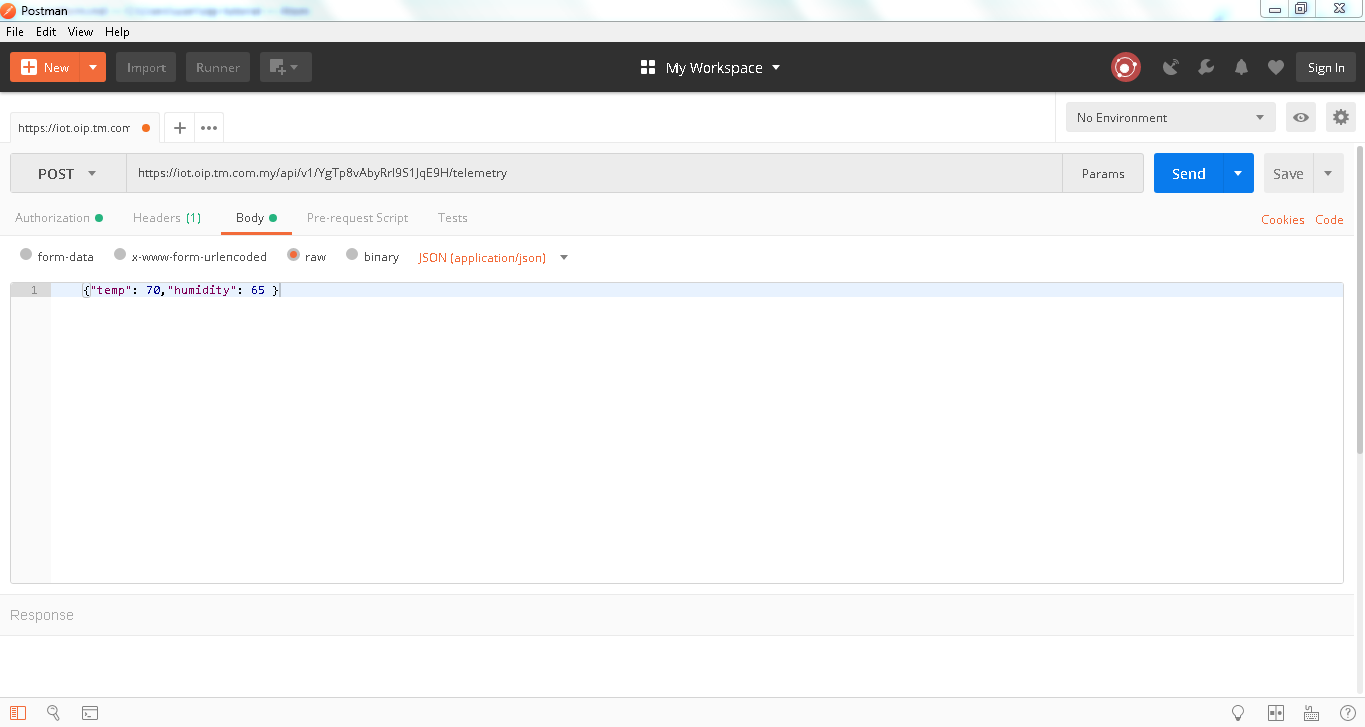
4. Click on Body section and you need to enter data in JSON format as shown.
  {
    temp: 70,
    humidity: 65
  }
5. When you hit try Send button you will receive the status of sending data on below application.

A successful transmission should return status code 200.
What's Next
It is encouraged to browse through our hardware tutorial using our tested IoT hardwares and sensors.
Contact Us
If you are facing any technical issue while using the OIP platform, please contact us at oip@tmrnd.com.my